Pantry Organization
Finally bringing you my pantry organization (and finally having an organized pantry!). One of the reasons it took so long was because I was waiting for the hyacinth baskets I used to come back in stock. If you missed my last post, I went through my planning process for the project. I actually created a type of “vision board” using Canva that I then used to order the right products and create labels.
It’s not something that’s necessary at all and I definitely don’t do it for every project but I felt it helpful to do here. I was having a little trouble envisioning the space, especially since it was in two cabinets. Probably a good time to mention, this isn’t a walk in pantry situation like I hope to have one day! So if you have a similar set up as mine, you’ll hopefully get some good advice here. And even if you have a walk in, many of the same methods apply!
The first thing I did when I moved in was decide which cabinet would be for what. I knew that even with only two of us in the house, only one cabinet for alllll our food wouldn’t be enough. Plus we don’t have that much kitchenware (only one set of everything and not a lot of serving ware) so I felt comfortable giving up two cabinets.
And, uh, as you can see the top shelves in both are still empty (along with the top shelves of every cabinet … we’re short so there’s no chance in getting up there anyway unless we climb).
I decided that the one closest to the stove would be used for more “cooking” items and the other would be more for snacks, coffee, etc.
We’ll start with that one since I’m a much bigger snacker than I am a cook! Seriously, I hardly ever reach in the other cabinet.
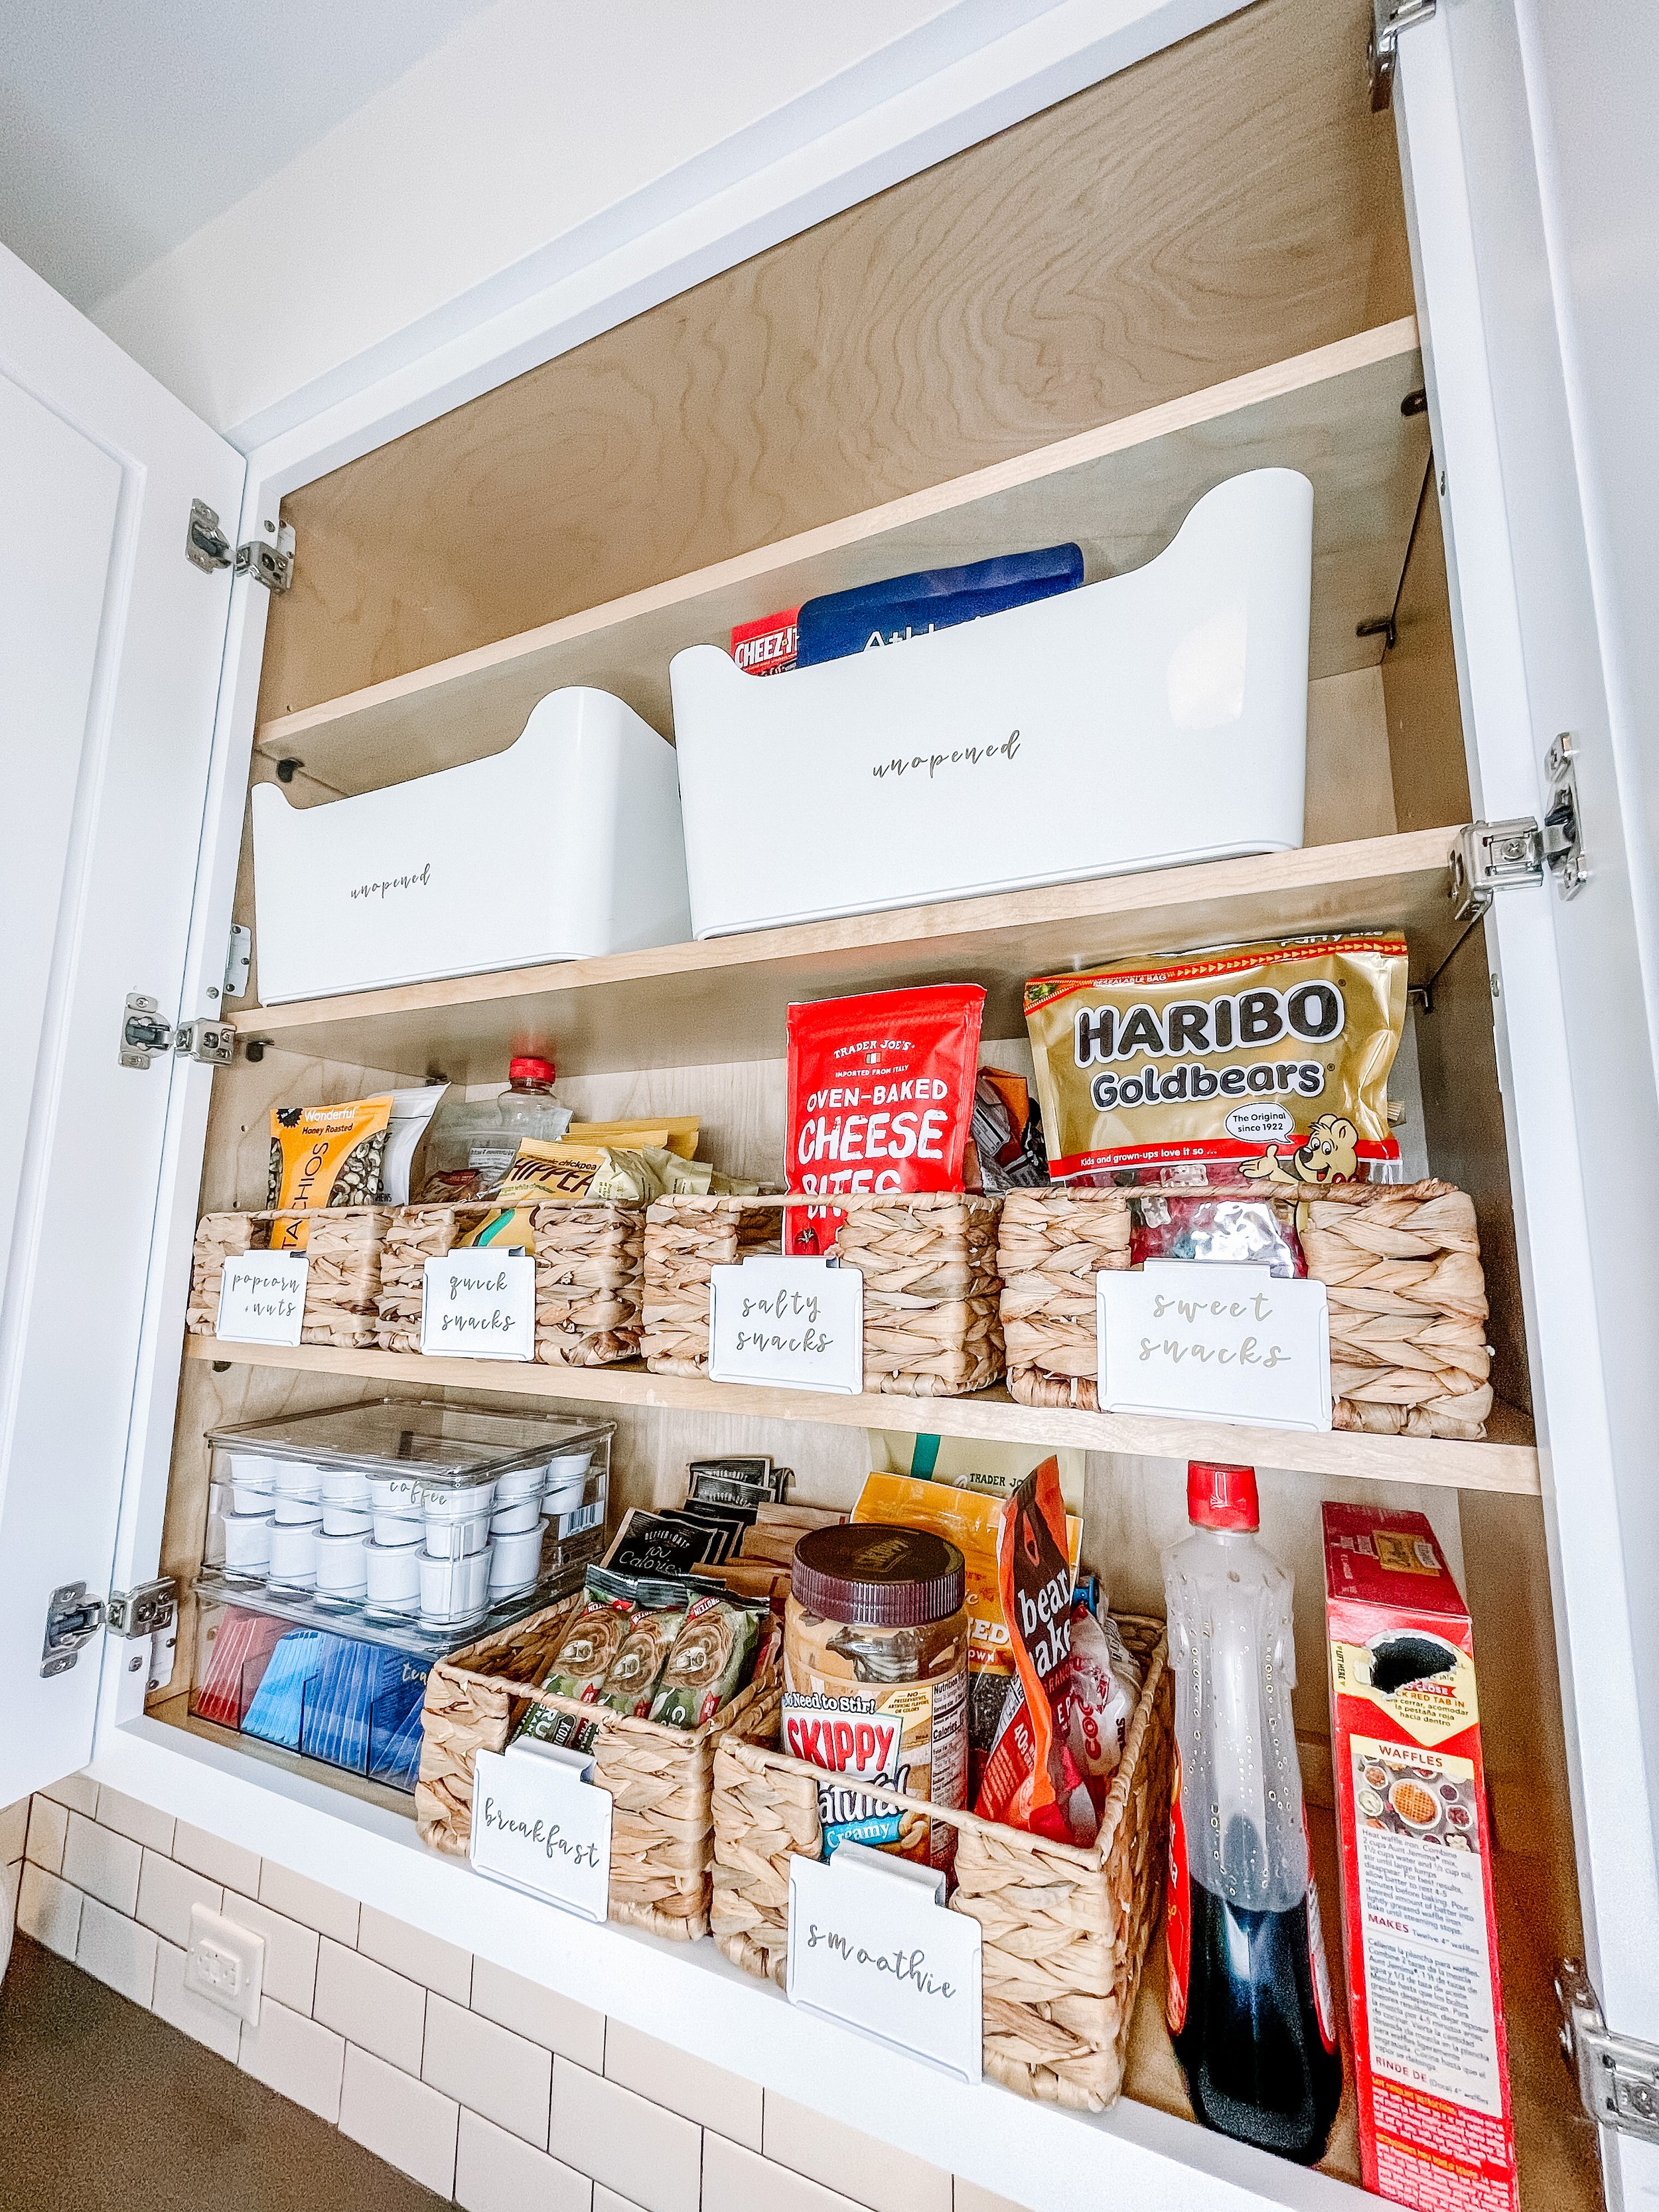
The first shelf has the morning stuff - breakfast, coffee, smoothie makings.
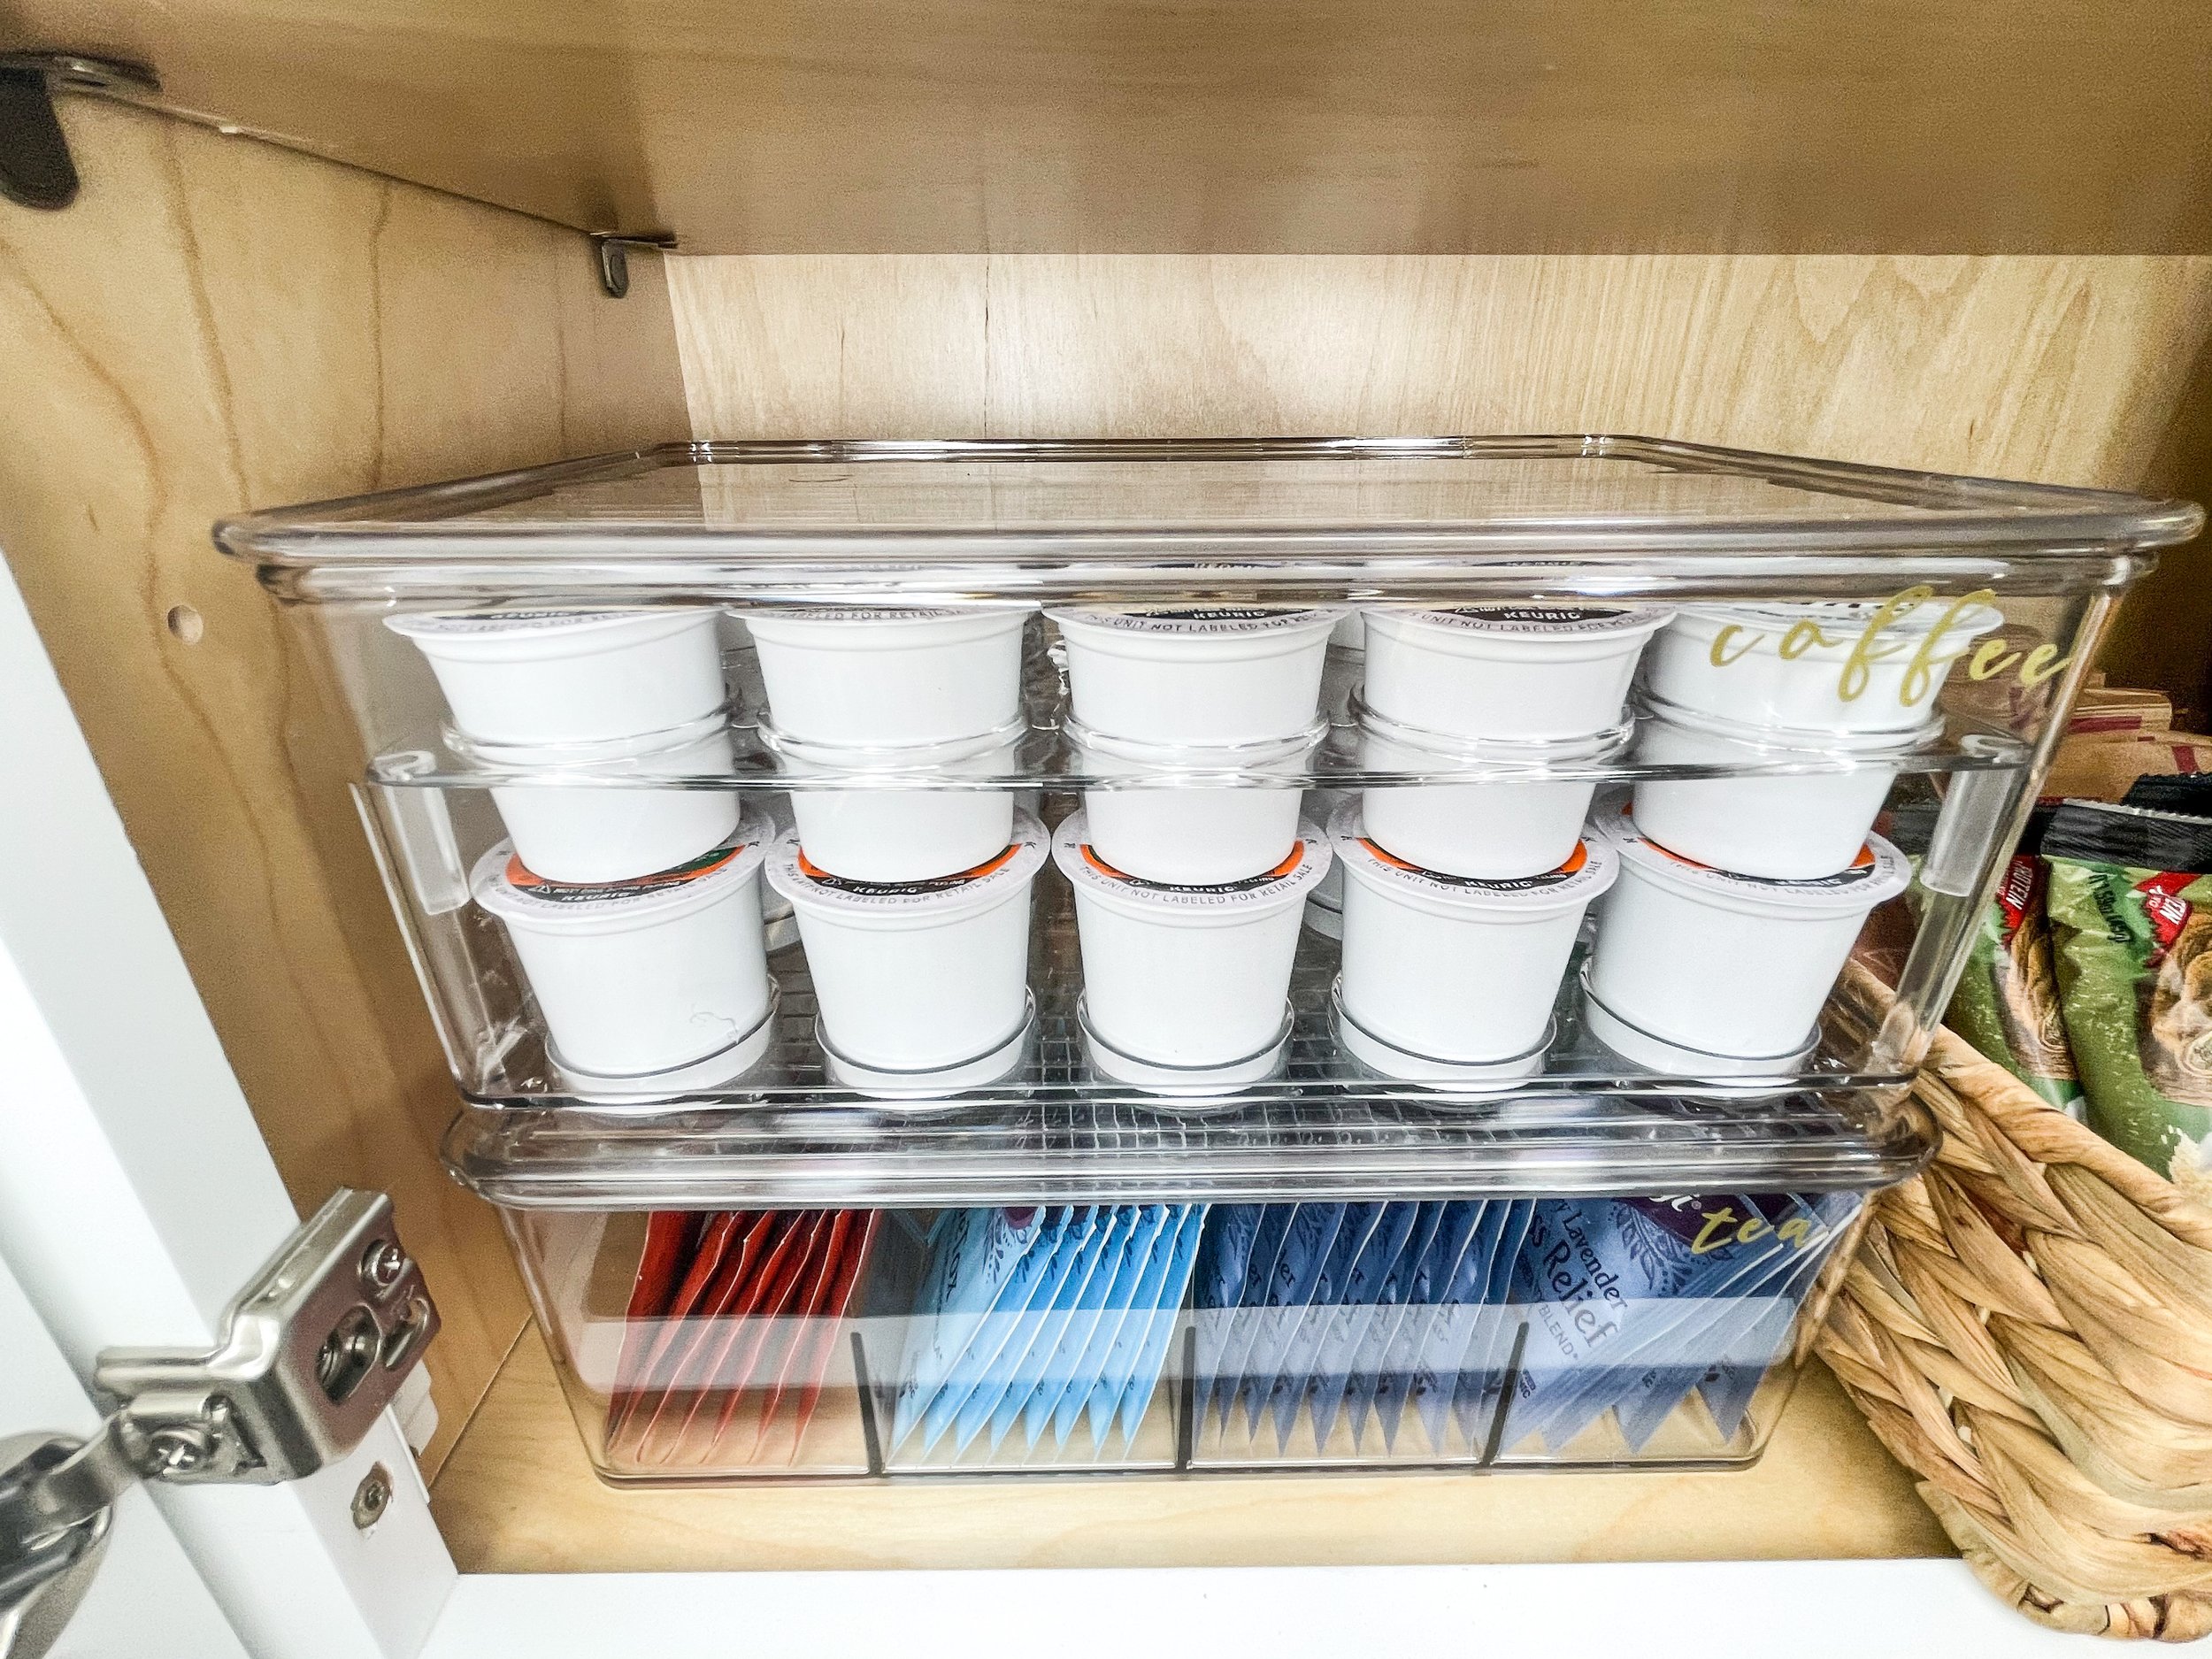
My Keurig (um, on sale for 50% atm!) is right below this cabinet and mugs are in the one next to it so it makes the most sense to have the pods right where they are. I bought this specific pod holder that I’ve wanted for years! I simply lift the lid and grab! It holds 29 pods - weird number, I know, but gives you wiggle room if you buy more before running out.
*You can find the pod holder on Amazon above or The Container Store for the same price!
Next to the coffee and tea is a breakfast bin which includes oatmeal and granola bars right now.
A note about decanting things like these from their boxes - look to see if they have expiration dates on the individual packets or bars. If they do, great. If they don’t, consider either not decanting them or understand if you/your fam will eat them up in time. If you eat things up frequently, no need to worry so much about the expiration dates. But if you tend to let things live in your pantry for, like, ever, then either forgo decanting as I mentioned or take a sharpie to each individual item and write the date. I know, I knowww it’s extra work but it takes all of a minute and you can get the decanted pantry look while also preventing food waste!
Next to this basket is the smoothie basket which holds the things I add into or onto smoothie drinks or bowls. I’ve thought about decanting stuff like granola or chia seeds into airtight containers but don’t think it’s super necessary. I can always do it down the line and add the containers into the basket or right next to it.
I decided to forgo a basket for the rest of the breakfast stuff - just pancake mix and syrup - because it would have been a little tight due to the coffee/tea holders plus those two things tend to get messy and as cute as these baskets are, they are a b I t c h to clean! Just be aware of that if you put anything sticky in them i.e. syrup or honey.
A quick word about cereal - we’re really not big cereal people but like to have them in the house for when we get the craving. We had two boxes that went stale so I’m seriously considering a dual cereal dispenser on the counter. I have the space so that wouldn’t be an issue. The other solution would be airtight cereal containers which I would then need to find a home. TBD on this!
You can find the same cereal containers at Amazon like I linked above or The Container Store for about the same price!
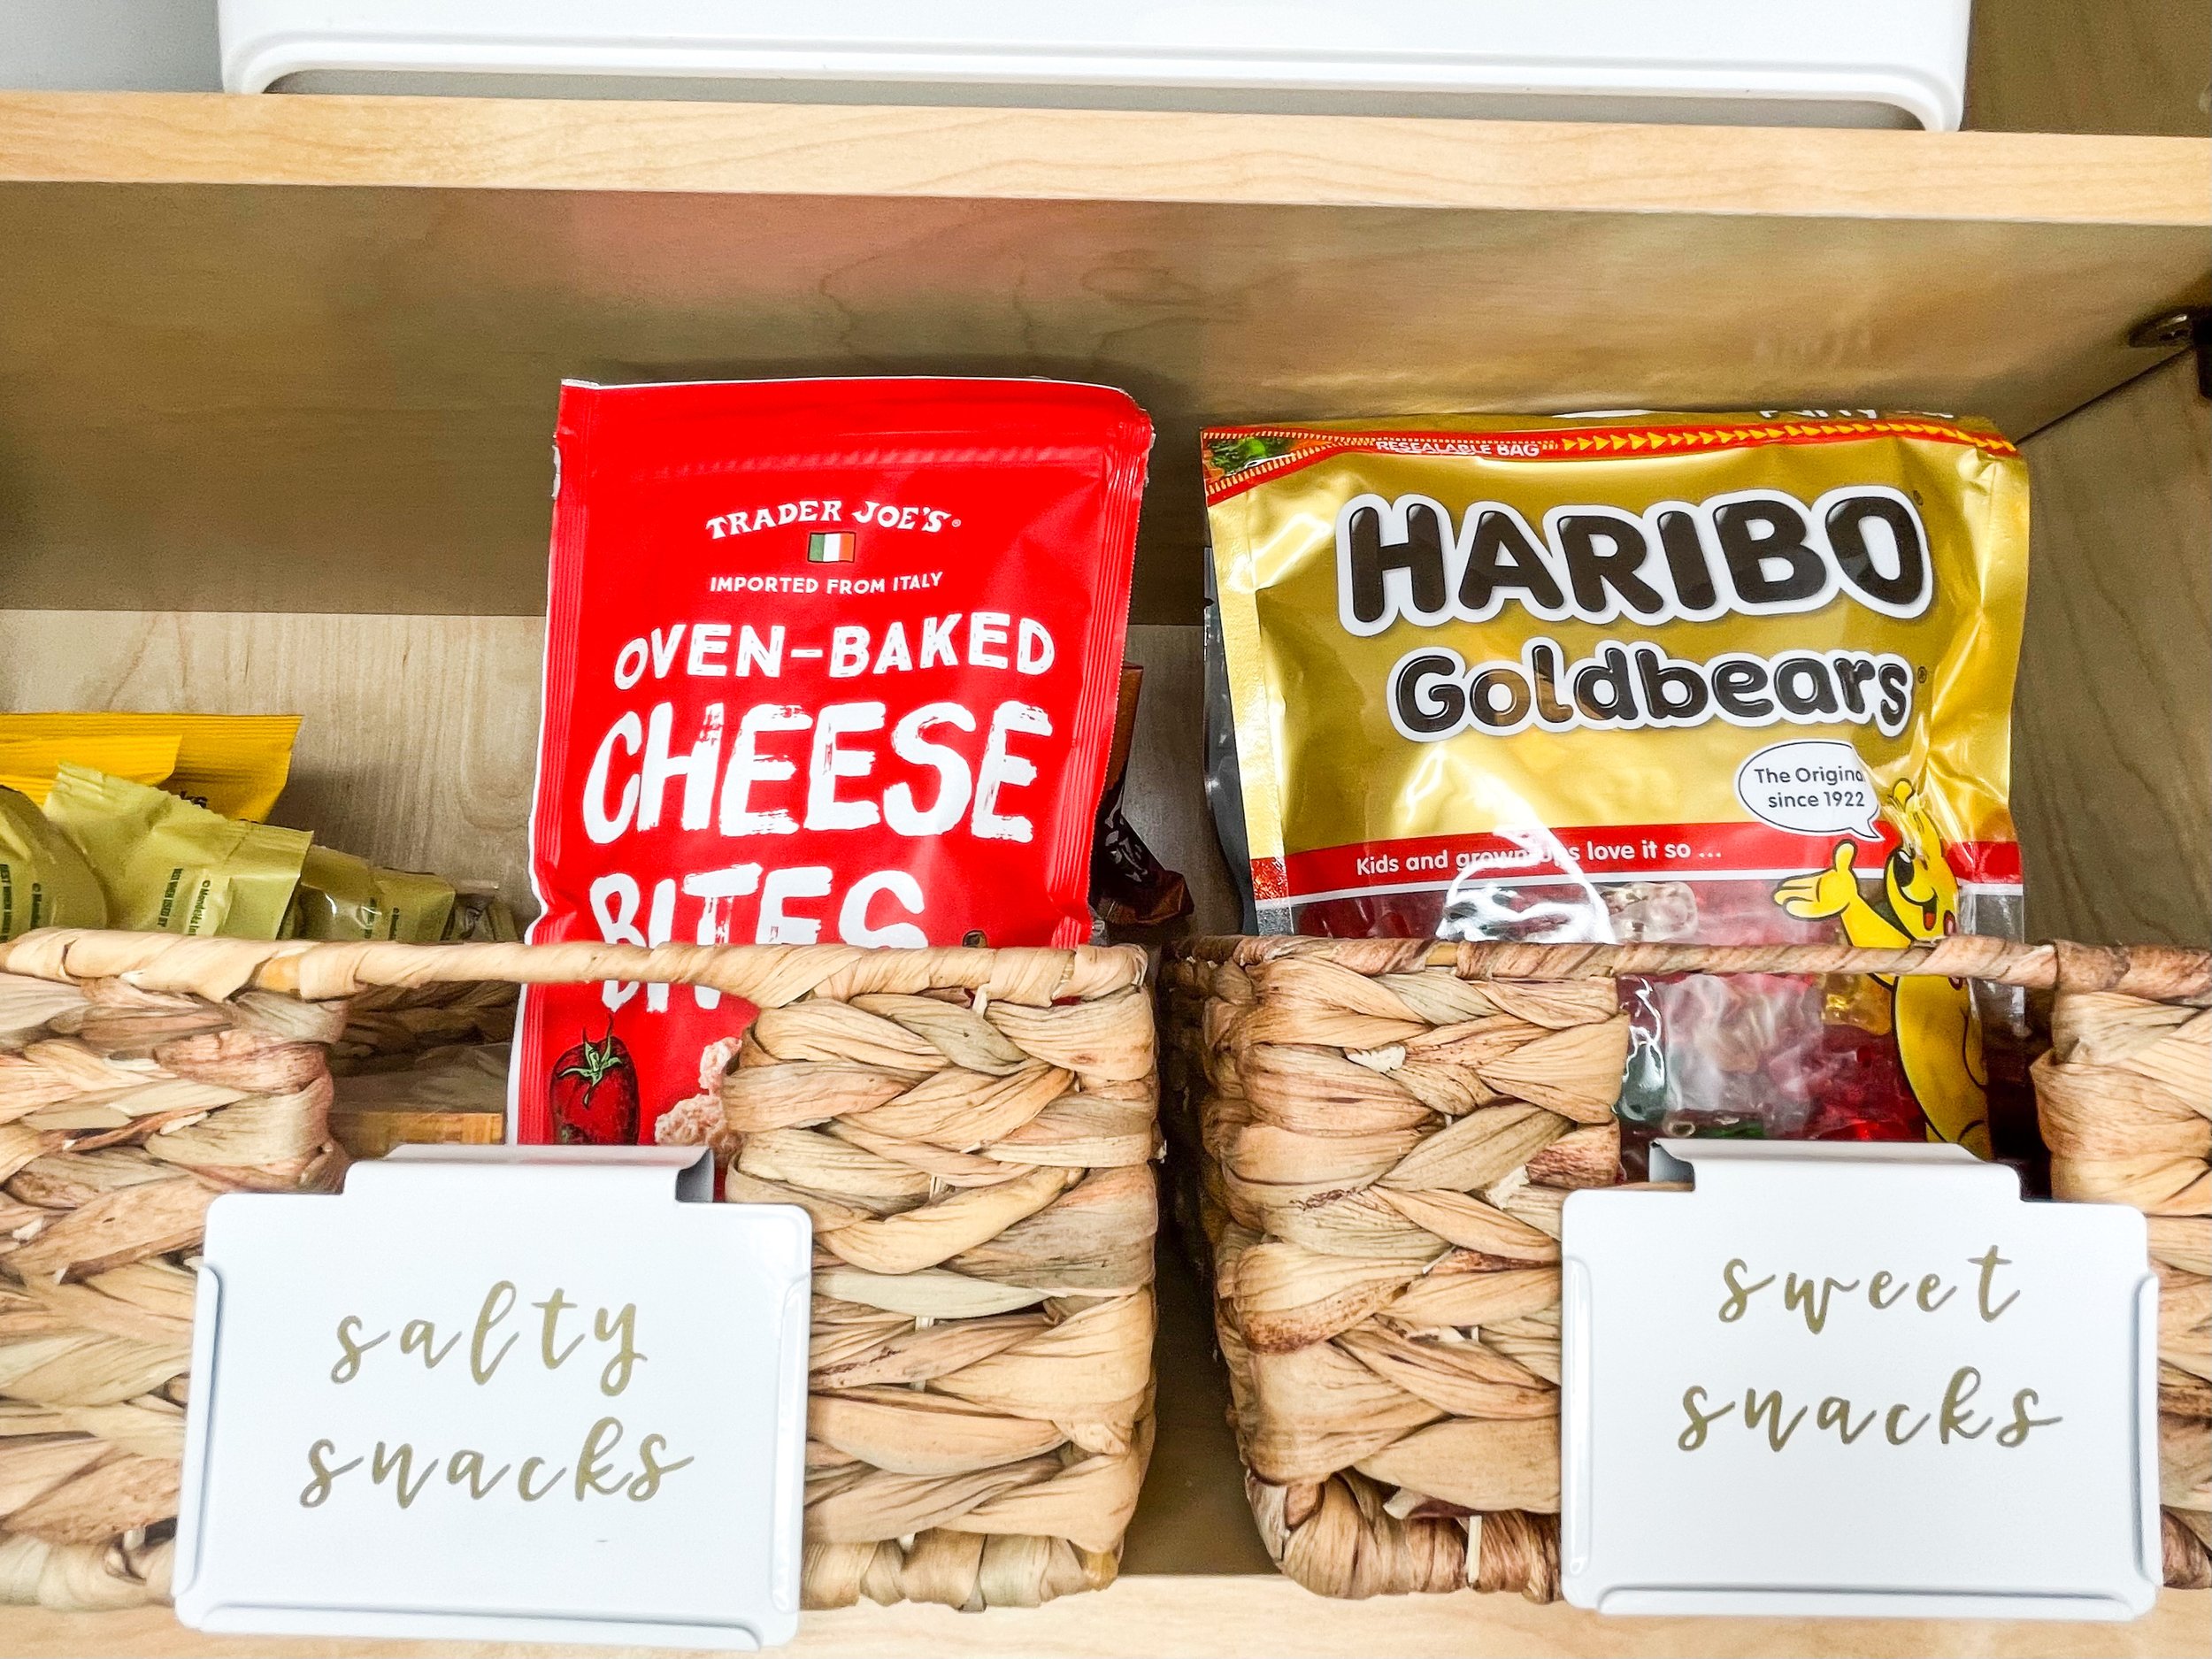
Moving up to my favorite section behind coffee - snacks! I had a few months of living with someone (with very different taste buds than me) to really see what we were buying and eating. I like to always have some sort of nuts and love to make homemade popcorn so I gave them their own category. Being that I work out of the house quite a bit, I sometimes have “grab n go” type snack (umm, who else loves Hippeas?!).
There’s also always some sort of crackers and chips aka “salty snacks”. And while I don’t love sweets, my boyfriend does so I gave him his own “sweet snacks” basket. We’ve done this before for Sort and Sweet clients and think it’s a great way to help you find whatever craving you have quickly!
The next shelf is another trick we use for clients. So many times there’s dozens of opened bags of chips, crackers, cookies, etc. and they take up so. much. space. So we like to create a space for open and unopened packages, hoping that the unopened don’t get opened until the opened ones are used up. You follow?
I had just done a huge grocery haul (I’m talking Trader Joe’s and Stop and Shop in the same day!) so the unopened bins are actually pretty full. If I need to down the line - and I can totally see this happening - I can put two more on the top shelf for extra storage.
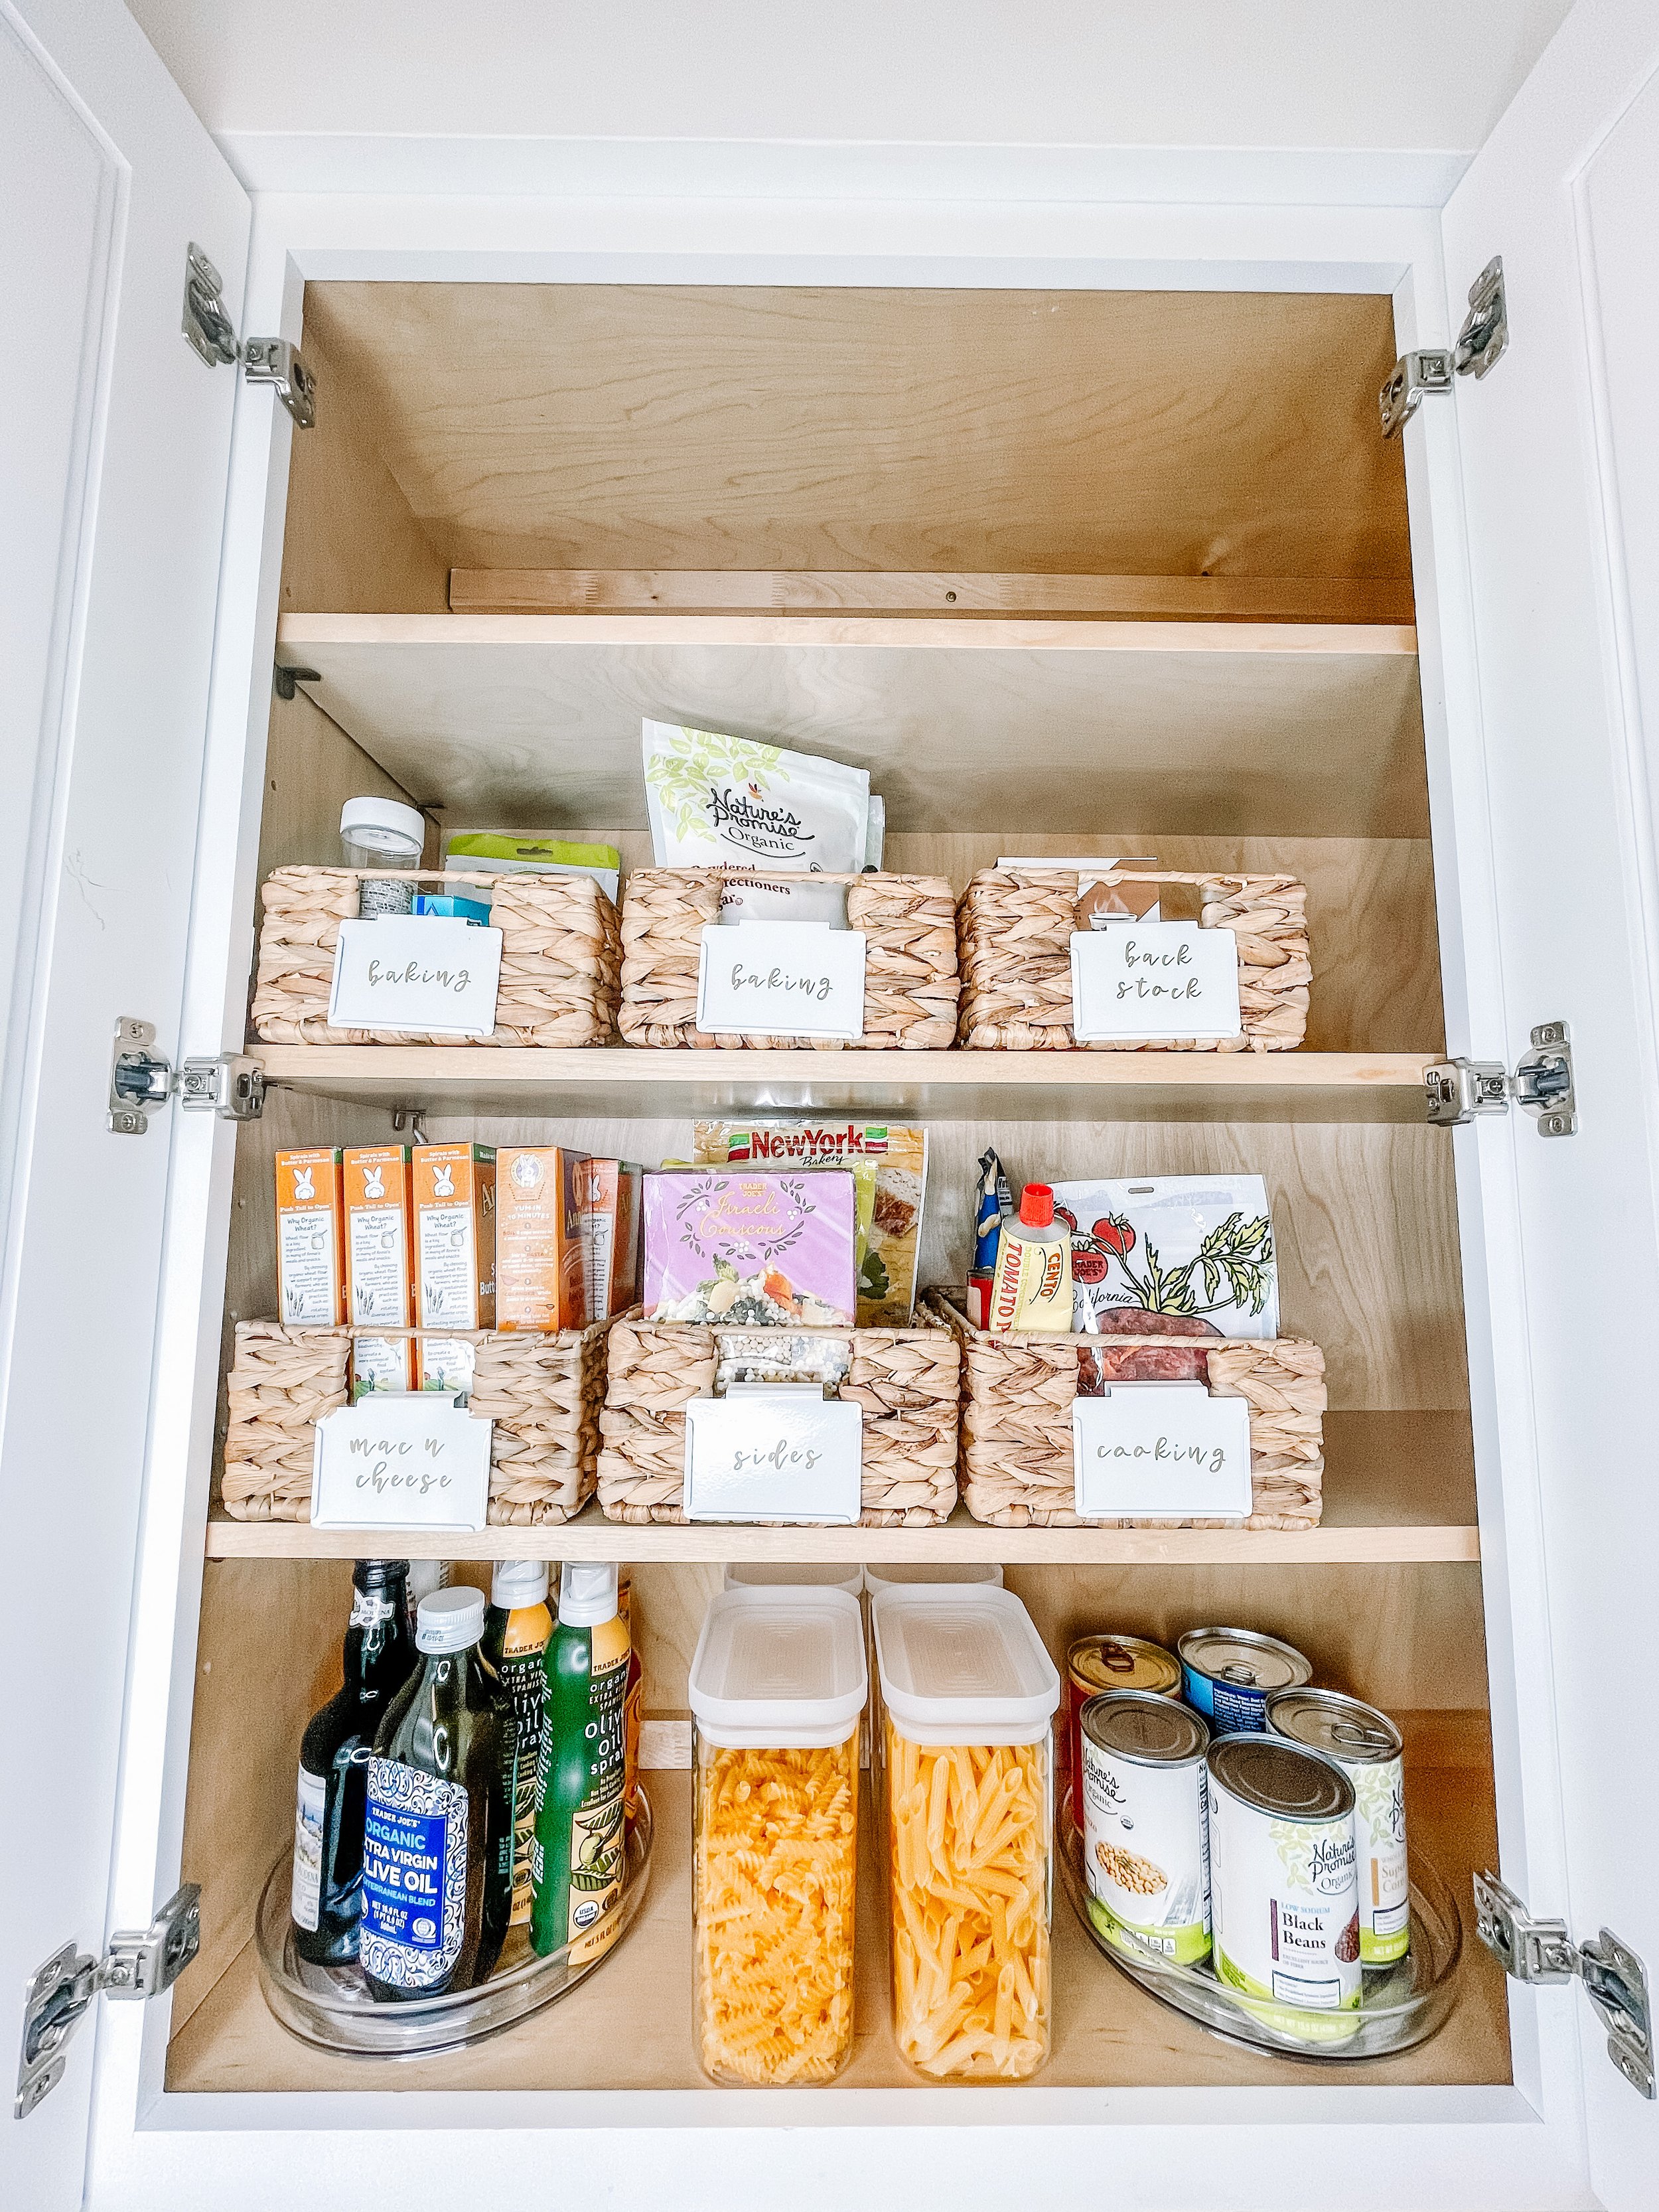
Now onto the second cabinet aka the cooking one! And baking as you’ll see.
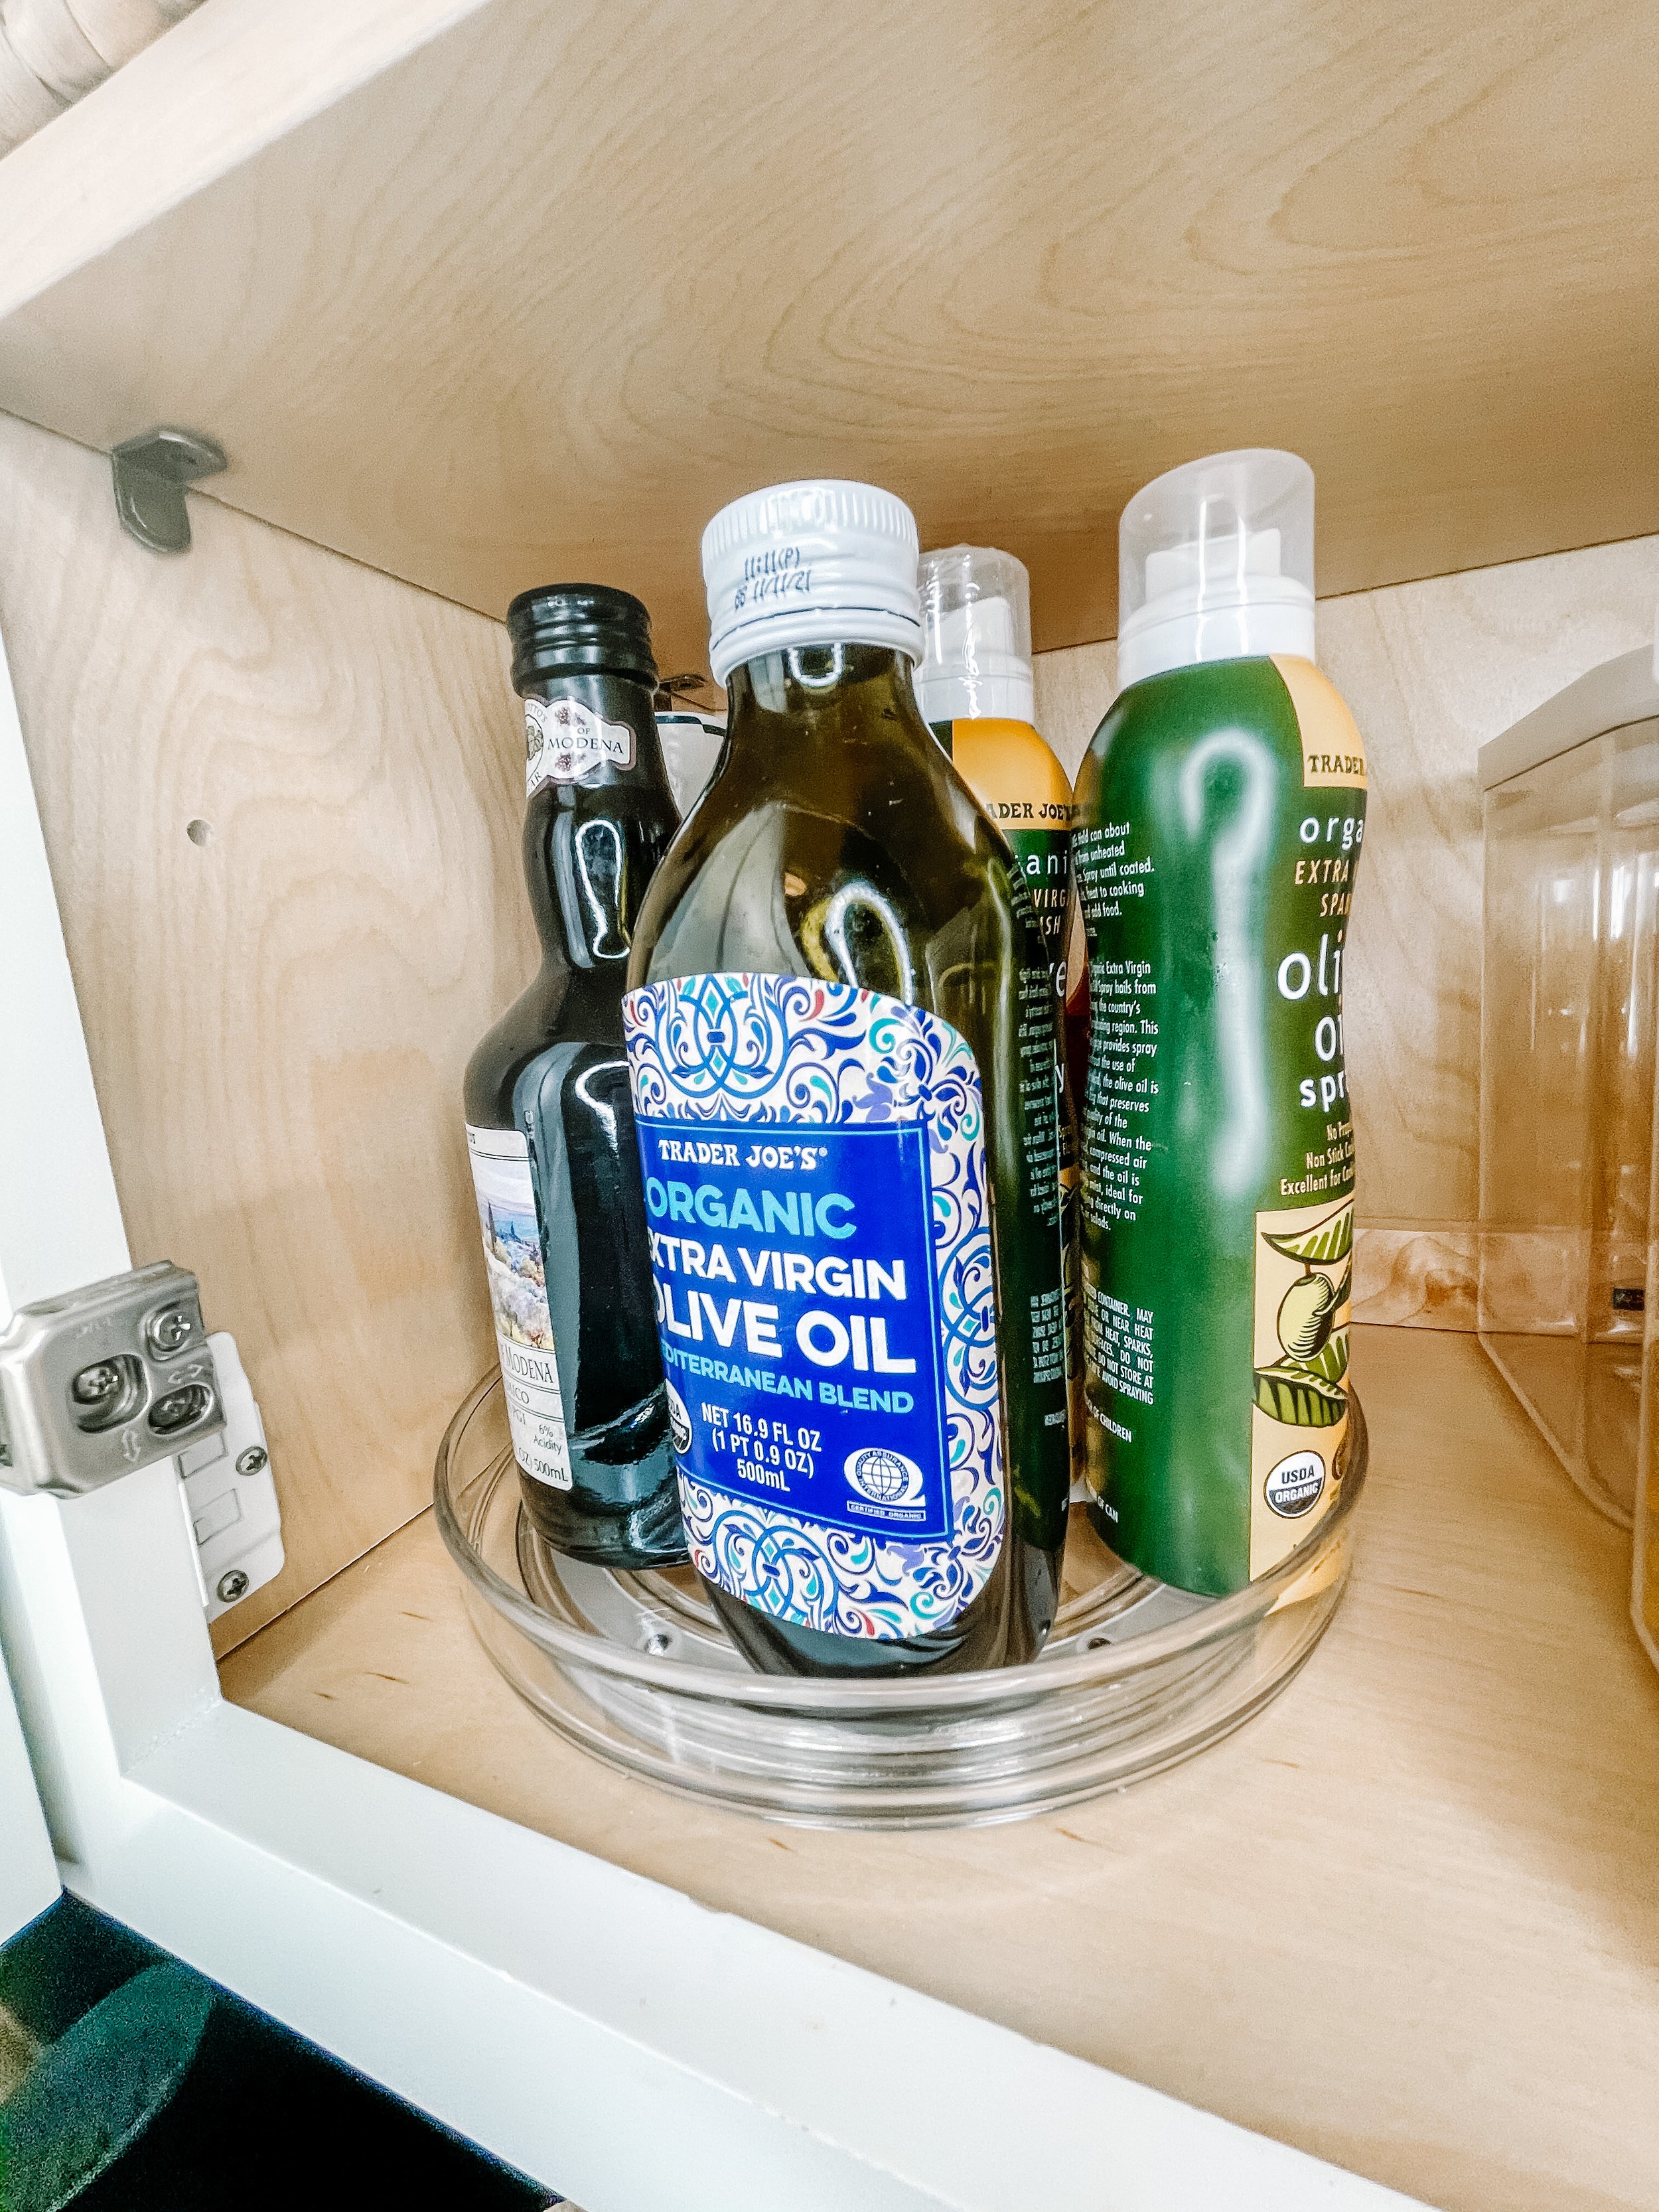
This was a little tricky because the cabinets - particularly the first one thanks to a lip in the back - aren’t so deep. I was limited to less than 10 inches so I was able to fit The Home Edit 9 inch acrylic lazy susans. The one closest to the stove had oils and vinegars along with some marinades.
The one a little farther away held cans. What I really wanted was an expandable shelf riser for cans but at a little over 11 inches deep, it wouldn’t have fit. This size lazy susan doesn’t fit too many cans but that’s where my backstock basket will come in handy ;)
I only recently started decanting pasta in my last apartment so these are the containers I had. They are not the OG Oxo kind but they work and they’re much more budget friendly!
Currently I have 3 out of the 4 containers filled which I stacked two in front of the other. It seemed like a waste of space if I spread them out and I know there is more pasta behind them. It’ll take me all of a second to pull a front one out to see.
The next shelf stores more cooking ingredients - like tomato paste and breadcrumbs. I put things couscous and quinoa in sides and mac n cheese gets its own basket just because we always have so much of it. Annie is super popular in this house!
On top of this is two baking baskets - one more for ingredients like sugar or vanilla extract and the other more for decorating like sprinkles and candles. Not that I do a whole lot of baking but enough that it warrants some space in the pantry.
I recommend that if you give yourself a baking bin or two to add your candles there because those tend to float all over the kitchen or wind up in a junk drawer. Putting them with other baking supplies gives them a home that you’ll think of to look for them in whether the cake is homemade or store bought.
I had space for one more basket (ok, a lot more - can you see how far this cabinet goes?) so gave myself a back stock, or overstock, section. This just gives me some wiggle room if I happen to buy more than I can fit in a basket, on a lazy susan, etc. And again, I can use the top shelf and sides of the cabinet if I need. They’re just not too easy to reach so I’d prefer to keep them clear.
Yes, clear space is a GOOD thing! Our nature as humans is to fill empty space but it doesn’t have to be! If we had a houseful of kids, the space would be fuller than it is, that’s for sure. Or I would probably create a pantry area just outside of the kitchen for more space. Or, more realistically, move to a bigger home lol
But this is perfect just for the two of us and by labeling everything clearly, I know when and what I need to restock.
Here’s a few tips for pantries in general:
If you have corner cabinets, consider large lazy susans on each shelf. Otherwise things will just get lost in there! Measure the space before buying of course but know that you can find them up to 18 inches in diameter, meaning you can fit a lot on them!
If you have kids that are old enough to reach their own snacks, let em! Less work for you, right? Decant their snacks like bags of Goldfish or applesauce packets into bins at their eye/reach level.
If you or someone else in the house has a special diet such as gluten free, create a section/container for those specific foods. It’ll just make it easier to see when to restock or grab when you’re cooking.
Specific labels for GF are good and if you have the same things over and over (like mac n cheese or popcorn and nuts) but in general, pantry labels should be, well, general. In other words, don’t label a bin of Goldfish “Goldfish” because your kids might decide they don’t like them soon and then you have to change the label. Just use “kid’s snacks”, “snacks” “grab n go” “quick snacks” or “salty snacks” for something like Goldfish so the contents of it can change easily.
Don’t feel the pressure to decant everything but know that it will cut down on the bulk of clutter by removing the bulky boxes. So if you’re short on space, this is a better option for you. Plus it looks cute AF!
Exact products I used in my pantry:
38 oz. rectangle canister with translucent lid (fits a normal size box of pasta + some)
Clear coffee pod holder (holds 29 pods) exact same product can be found on Amazon
Clear tea bag holder (holds approx 60 bags) similar product can be found on Amazon
I hope you’ve found this helpful/got some ideas for your pantry organization project! I’ve got a few other projects in the works so not set yet on which one I’ll showcase next but stay tuned!
If you have any questions, please feel free to leave a comment or email me mary@organizedoverall.com. See you soon!
PS I have an Etsy shop now if you’re looking for gifts for that organized person in your life!
*Disclosure: I only recommend products I would use myself and all opinions expressed here are my own. This post may contain affiliate links that at no additional cost to you, I may earn a small commission.
